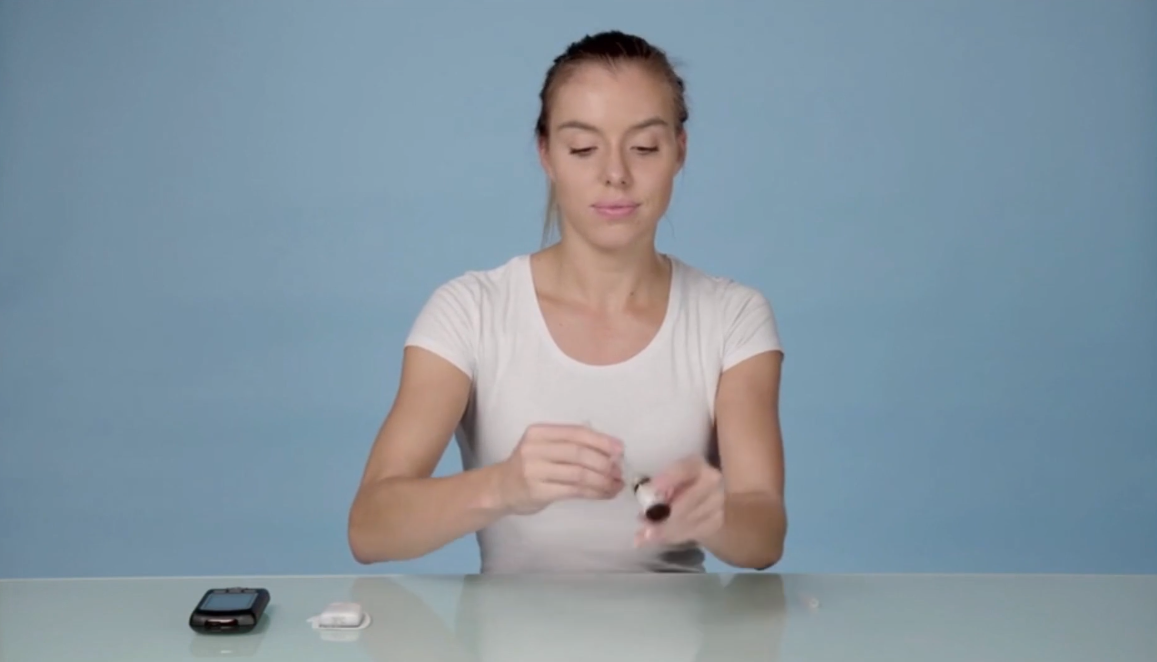
Wash your hands thoroughly and disinfect the part of the body where the pod will be applied.
Make sure that you have a smooth and clean work surface.
Now take all the elements out of the package and lay them out on a clean surface so that they are easy to find.
Preparing the LUTREPULSE® solution
You have received a LUTREPULSE® KIT pack from your physician. It also contains syringes and needles. Draw 3.2 ml of solvent up from the solvent vial using a needle and a syringe.
Slowly add the solvent to the vial containing the powder (ideally against the inside wall of the vial). The resulting solution should be clear and colourless.
Dispose of the injection syringe and the long needle.
Attach the short needle to the smaller syringe (both are included with the single pod) and remove the protective cap.
Now draw the small syringe up to Max Fill level with air and then pierce the rubber cap of the vial filled with LUTREPULSE® solution using this syringe. Turn this bottle upside down and inject all the air into it.
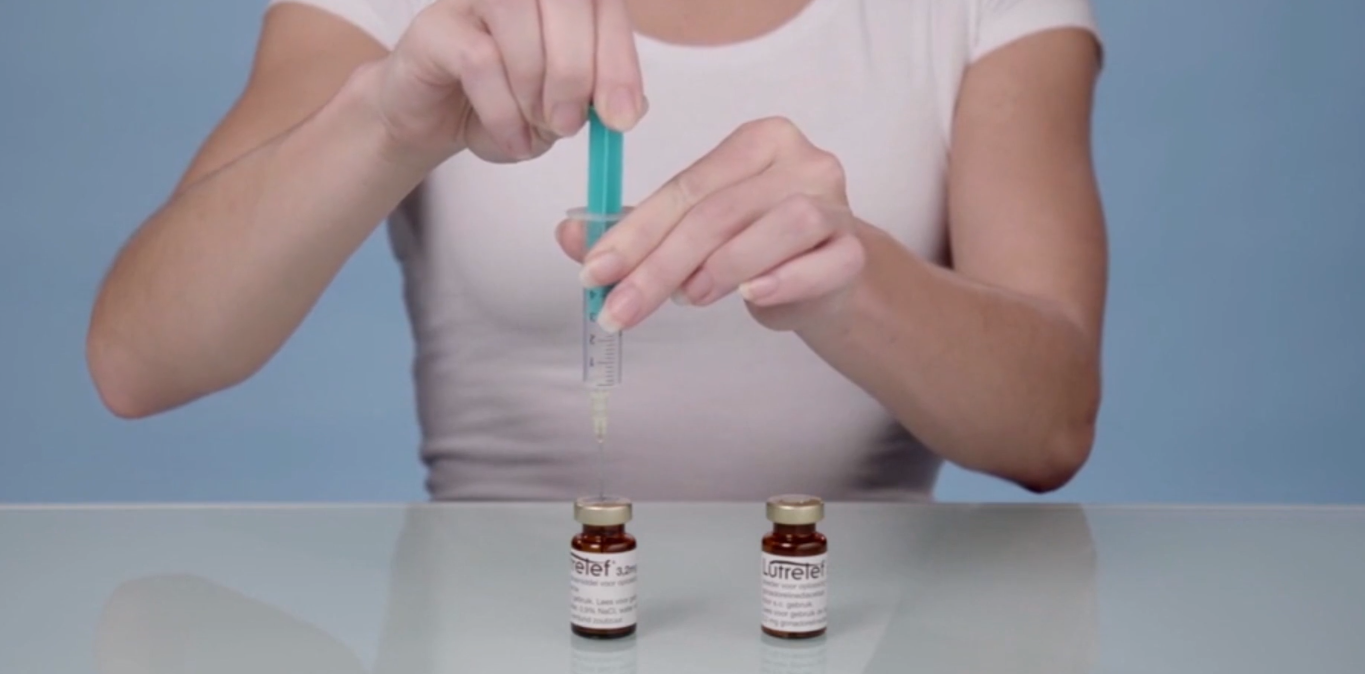
Turn the vial upside down and add 2 ml LUTREPULSE® 3.2 mg solution into the syringe.
To fill the pod, insert the short needle vertically downwards into the filling opening marked with the arrow.
You will hear two beeps at the end of this process.
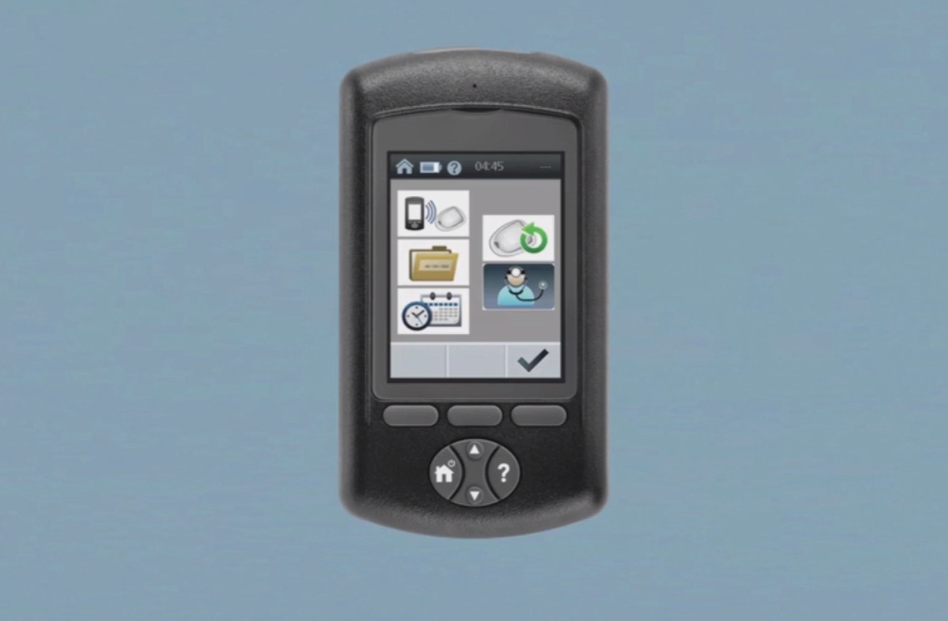
Press the black arrow to continue.
The system will now prepare the pod for use. You will hear a beep at the end of this process.
You may hear a clicking noise, this is normal.
Before filling the pod, place the manager and pod close together so they are touching.
Every time a new pod is used, the site on the body should be changed.
The new body part should be at least 2.5 cm away from the previous one.
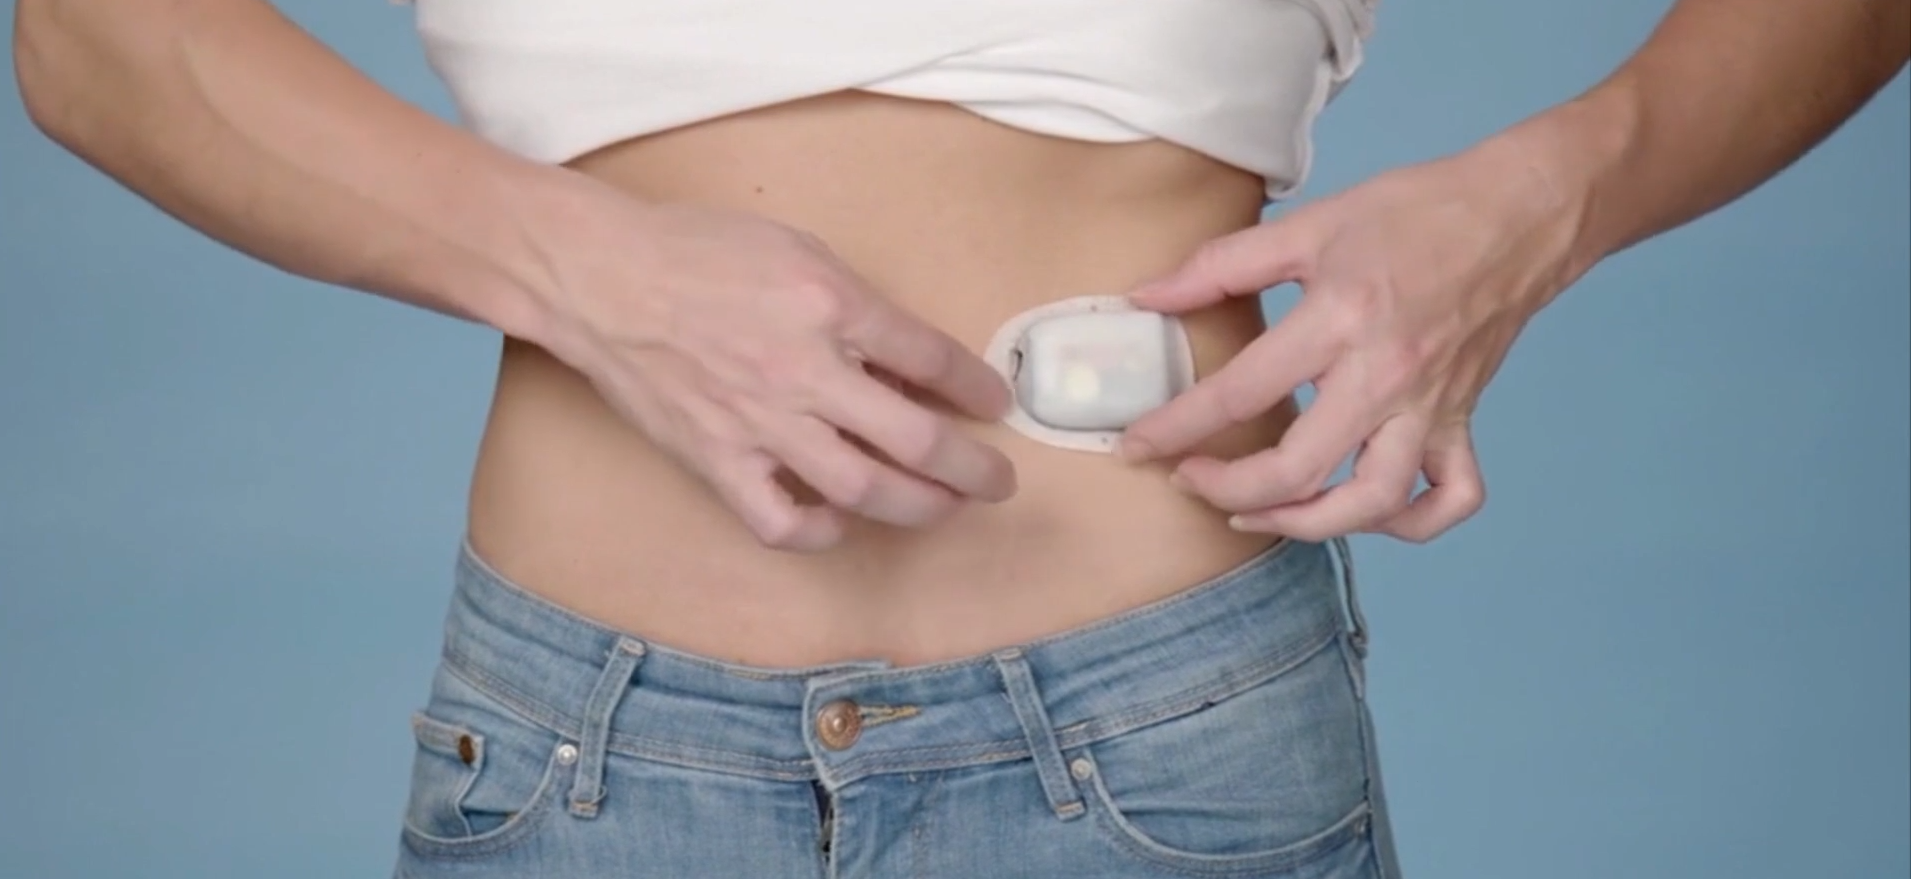
Remove the needle protection cap and the protective film of the self-adhesive layer on the underside of the pod and stick the pod where you would like it.
Press the black arrow to insert the soft cannula into the skin.
The pod will now automatically inject the first dose.
Use the viewing window to check that the light blue cannula is correctly positioned.
Press to confirm. Also, make sure that the “pink” cannula activation is visible and has moved from the centre of the pod to the upper third.
After confirming that the cannula has been inserted correctly, the manager will display the status menu with the “pod active” icon.
The pod is now active for 72 hours. The date and time of the next pod change are displayed.
Wash your hands thoroughly and disinfect the part of the body where the pod will be applied.
Make sure that you have a smooth and clean work surface.
Now take all the elements out of the package and lay them out on a clean surface so that they are easy to find.
Preparing the LUTREPULSE® solution
You have received a LUTREPULSE® KIT pack from your physician. It also contains syringes and needles. Draw 3.2 ml of solvent up from the solvent vial using a needle and a syringe.
Slowly add the solvent to the vial containing the powder (ideally against the inside wall of the vial). The resulting solution should be clear and colourless.
Dispose of the injection syringe and the long needle.
Attach the short needle to the smaller syringe (both are included with the single pod) and remove the protective cap.
Now draw the small syringe up to Max Fill level with air and then pierce the rubber cap of the vial filled with LUTREPULSE® solution using this syringe. Turn this bottle upside down and inject all the air into it.
Turn the vial upside down and add 2 ml LUTREPULSE® 3.2 mg solution into the syringe.
To fill the pod, insert the short needle vertically downwards into the filling opening marked with the arrow.
You will hear two beeps at the end of this process.
Press the black arrow to continue.
The system will now prepare the pod for use. You will hear a beep at the end of this process.
You may hear a clicking noise, this is normal.
Before filling the pod, place the manager and pod close together so they are touching.
Every time a new pod is used, the site on the body should be changed.
The new body part should be at least 2.5 cm away from the previous one.
Remove the needle protection cap and the protective film of the self-adhesive layer on the underside of the pod and stick the pod where you would like it.
Press the black arrow to insert the soft cannula into the skin.
The pod will now automatically inject the first dose.
Use the viewing window to check that the light blue cannula is correctly positioned.
Press to confirm. Also, make sure that the “pink” cannula activation is visible and has moved from the centre of the pod to the upper third.
After confirming that the cannula has been inserted correctly, the manager will display the status menu with the “pod active” icon.
The pod is now active for 72 hours. The date and time of the next pod change are displayed.